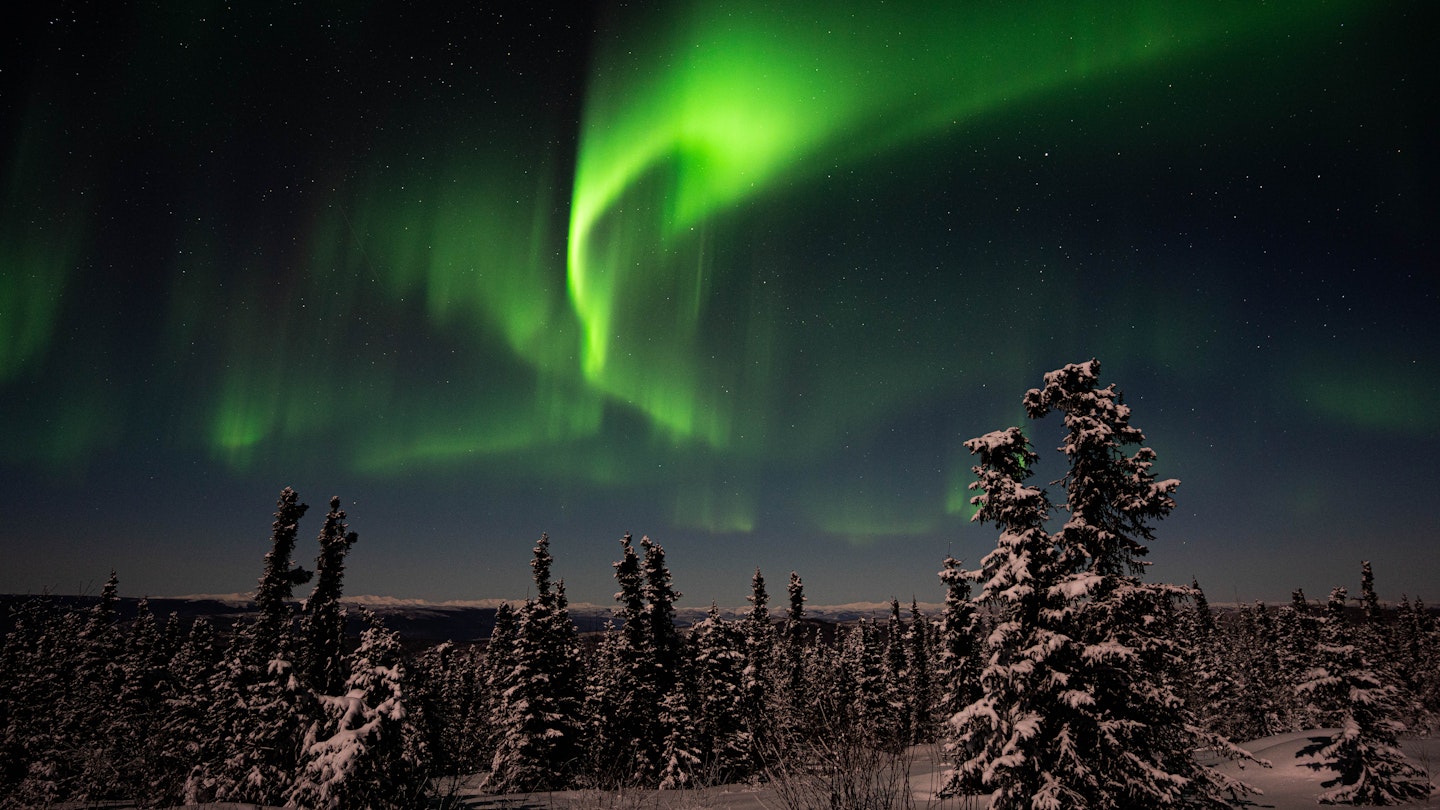
Seeing the northern lights can be one of the greatest thrills in nature. However, capturing the elusive aurora borealis on camera can be a bit tricky unless you’re a skilled photographer. Expert Robert Annis shares some essential photography basics you should know before you set off on your aurora adventure.
The Gear You Need
Camera that works well in low-light situations: A reliable camera is crucial. Using a Sony A7Riii as a primary camera body and a Sony A6500 camera as a backup is a solid choice. Employ a shutter-release cable, remote, or utilize a two-second shutter delay to avoid blurry images.
Wide-angle lens with a large aperture: This feature allows you to capture as much light as possible. A lower f-stop means a larger aperture. For example, a Tamron 17-28mm F2.8 lens works well.
Extra batteries: Cold weather can quickly drain batteries. It’s advisable to keep one battery inside a warm area and another in an inside pocket for optimal performance.
Stable tripod: Given the potentially challenging conditions, a sturdier tripod than typical travel versions is ideal. Consider a Manfrotto ball head on heavy-duty, durable carbon-fiber tripod legs.
Headlamp with a red-light setting: Using a red light allows you to maintain night vision, essential while photographing.
Warm clothes: Spending hours outdoors demands proper attire. A heavy parka, thermal accessories, snow pants, and insulated boots keep you comfortable and focused on getting those stunning shots.
If a DSLR or mirrorless camera isn’t on hand, apps like the Northern Lights Photo Taker can serve as alternatives. The latest iPhone models offer impressive camera capabilities for capturing the aurora.
Download an aurora-forecasting app for assistance, but remember that conditions can change rapidly.
Planning Your Trip
When planning an adventure to see the northern lights, timing and location are critical. Allocate as many days as possible for your trip. Expert testimonials indicate that patience is essential; for instance, a couple in Fairbanks, Alaska, had pursued the aurora for four nights without success—only to see it on their flight home.
As Eddy Savage, a guide for Natural Habitat Adventures emphasizes, nature doesn’t adhere to schedules, so it’s vital to dedicate ample time to the pursuit.
Moreover, consider timing your trip with a half- or quarter-moon phase to enhance your foreground lighting without overwhelming the aurora.
Choosing a location within the Aurora Oval significantly boosts your chances of witnessing the natural spectacle. The period from January to March typically offers the best visibility due to clearer skies. Notably, temperatures can plummet below -30°F (-34°C), so prepare accordingly.
Decide whether to venture alone or enlist the help of a guide. For novices in unfamiliar areas, guided services can be invaluable for both logistics and on-site photography instruction.
What to Do When You Get There
Preparation is key. The northern lights may appear briefly or last for hours. They usually come in waves, starting with a small band that quickly fades and followed by more vivid displays. Thus, it’s advisable to have your camera set up and ready, ideally pre-framing your initial shot.
Establish your camera in a well-lit area before moving outdoors. Starting with a five-second shutter speed at F2.8 and an ISO of 2000 is prudent. Adjust these settings based on the activity: if the aurora is bright, reduce the shutter speed to capture more detail; if dim, increase the shutter speed or ISO for better clarity.
Switch to manual focus, positioning it near the infinity mark due to low light. Modern cameras often allow for spot magnification to verify focus. Mark the spot if necessary, and periodically check it to ensure consistency throughout your shoot.
Frame your compositions with interesting foregounds, such as trees or unique rock formations, rather than just capturing the lights themselves, which can appear less captivating in isolation.
To prevent condensation in colder temperatures, avoid bringing your camera indoors. Instead, remove the battery and leave your camera outside on the tripod. Gradually warm up your equipment by storing it in a zippered camera bag after the session.
Lastly, don’t let initial cloudy conditions deter you. As Nicholas Wagner recounts, conditions can change rapidly, leading to potentially brilliant displays after storms.
Recognize that not everyone will see bright green lights as depicted online; various factors, including age, influence visibility. Understand that perseverance is key, and it may take numerous attempts to capture that perfect shot.
Finally, if fortunate enough to witness a magnificent aurora, take a moment to simply enjoy the breathtaking beauty of the experience, rather than seeing it wholly through a lens. It is genuinely a magical experience that should be appreciated fully.

