What Are the Northern Lights Exactly?
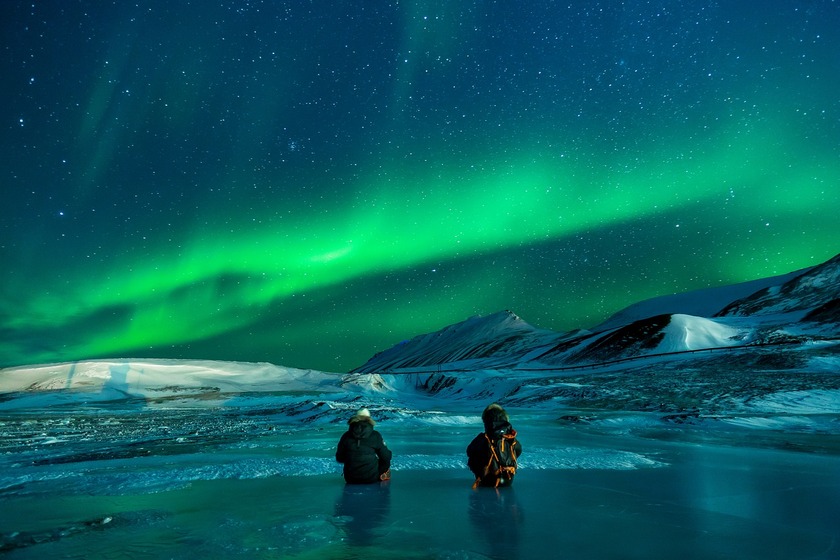
There’s a straightforward scientific explanation for the Northern Lights, which doesn’t make them any less magical. The phenomenon’s scientific name is Aurora Borealis. It occurs due to increased solar wind activity and its interaction with the Earth’s atmosphere. Solar winds discharge particles, mostly protons and electrons, out into space. The Earth’s magnetic field extends around the planet but forms funnel-like lines above both Polar Regions.

The funnels draw in some of those solar particles, which interact with gas molecules in Earth’s atmosphere. This leads to ionization and puts the gases in an excited state. Going back from ions into regular molecules causes a release of energy that manifests as light. Its color varies based on the affected molecules, while the shape depends on the solar wind’s activity and atmospheric conditions. Most lights are green due to oxygen, but they can display red, purple, or even blue hues if enough nitrogen atoms are present.
When & Where Do They Happen the Most?
Technically, the Northern Lights are active year-round and can sometimes be visible as far south as the continental US and southern Europe. However, such sightings are rare. The closer you are to the North Pole, the higher your chances. Ideally, you’ll want to travel somewhere inside the Northern Lights Belt. This belt encompasses parts of Alaska, Canada, Iceland, Norway, Sweden, Finland, and Russia. Longer nights also increase the odds of viewing, although the Aurora may appear during twilight hours. Peak sighting periods vary by country, but your best bet is to start Aurora chasing in October or between January and March.
How to Plan Your Trip?
The Northern Lights are whimsical, and there’s no guarantee you’ll spot them on a particular evening. Maximizing your chances involves going at the right time of year; however, there are other factors to consider as well. Weather is crucial since cloudy skies and a full moon create poor viewing conditions. It’s advisable to set aside several nights for Aurora chasing while ensuring the trip remains enjoyable even if you don’t catch sight of any lights. Look for guided tours that offer additional activities like dog sled riding, hiking, and even experiencing saunas to fill your time. Moreover, consider your lodging. Opt for cabins, lodges, or accommodations with north-facing views of mountains or lakes for the best experience. Make sure to book in advance as vacancies can be limited.

It’s also wise to use a VPN when making travel arrangements and experiment with different geographical locations for the best possible deals. Additionally, using a VPN can enhance your online privacy by masking your real IP address, making it more challenging for websites and advertisers to track your movements across the web. However, it’s essential to understand that while a VPN significantly increases online anonymity, it is not completely foolproof. Use this information wisely and with discretion.
What Should You Bring?
When preparing for your trip, prioritize warm, layered clothing and sturdy footwear as you may be in sub-zero weather for extended periods. Hand and leg warmers are also essential since cold affects extremities first. Ensure you have a local map, blankets, and flashlights to navigate in the dark. Pack hydration kits and adequate provisions in durable backpacks. Additionally, remember to bring necessary items you’ll need when returning to civilization.

Do not forget essentials like a toothbrush, medications, or perhaps an aurora-themed item to enjoy during your time. While the countries ideal for viewing the lights are generally safe, it’s still important to manage personal and financial safety while traveling. Opt for prepaid travel cards for financial transactions to secure your funds. Lastly, evaluate your VPN options using comparison tables to ensure safe internet access while abroad.
How to Photograph the Lights?
Capturing the beauty of the Aurora requires more than just a smartphone! It’s recommended to use a dedicated DSLR or mirrorless camera to achieve impactful long-exposure photos and time lapses. Consequently, a tripod and remote shutter are essential for stabilizing your shots. To avoid complications, dial in the correct camera settings before heading out; this allows you to focus on enjoying the experience instead of adjusting equipment. Set a lower ISO value and opt for a bright, wide-angle lens. Ensure to set the focus manually as well. Given the freezing weather conditions, it’s advisable to bring extra batteries for your camera and an insulated pad to stand on. You might be out for hours, so routinely check and dry your equipment afterward to prevent condensation.

