Photography Tips: Improving Your Skills
- Who is Robert Gershinson?
- Things to Consider Before We Start
- 1) Freeze Using Shutter Speed
- 2) Deep Blacks
- 3) Frame Up and Wait
- 4) Crop
- 5) Flat / Depth
- 6) Understand Story
- 7) Use the Big Light in the Sky
- 8) Ignore the Truth
- 9) Achieve Depth by Shooting Through Things
- 10) Shallow Depth of Field
- Top Tip
You love photography, right? You snap lots of life’s memories to cherish, enjoy, and share with friends and family. However, how do you ensure you’re capturing the ‘type’ of photos you want?
Thankfully, photography is subjective and personal—one type of shot works in specific situations (or for certain people) but not in others, which can be both great and tricky!
Recently, we engaged in a conversation with our close friend, Robert Gershinson—a talented professional photographer who has managed to turn his passion into a career.
Robert dedicated time from his busy shooting schedule to help create a guide on improving photography skills and unleashing the professional photographer within all of us!
Who is Robert Gershinson?
Robert is a London-based photographer and video director who has captured a whos-who of musicians: Alice Cooper, Spandau Ballet, Florence + The Machine, Everything Everything, Foxes, and many more.
He also blogs and podcasts under the banner SHOOT FIRST TALK LATER.
Each guest participates in a portrait session, photographed by Robert. When he’s not behind the lens, he enjoys cinema or immersing himself in a variety of comics.
Take a look at some of his top suggestions below.
Things to Consider Before We Start
The camera is merely a box that you let light into, which travels down the lens, passes a shutter, and hits a digital sensor that captures an image.
Aperture (Av): This is the size of the hole (usually at the back of the lens) that allows light into the lens. Aperture is measured in f-stops. Examine this infographic.

The smaller the f-number, the wider the hole—yes, it seems a little backwards—which means more light entering the lens. This is why your camera refers to Aperture as ‘Av’—aperture value.
Aperture also controls the Depth of Field (DOF)
DOF refers to the amount of the image that is in focus. A wider aperture (smaller f-stop number) results in less DOF. For example, an f-stop of 1.4 means the background will appear significantly blurry, while a narrower aperture (larger f-stop number) has the opposite effect.
Shutter Speed (Tv): While aperture controls how much light enters the lens, shutter speed regulates how quickly that light passes through. This is why shutter speed is often labeled as ‘Time Value,’ abbreviated as ‘Tv’ on your camera dial.
A visual representation of what occurs when the shutter button is pressed can be viewed in a brief video.
When the shutter button is pressed, the camera’s mirror rises, revealing the shutter positioned over the lens. This shutter moves, exposing the sensor to the light entering the lens (set by Av). The second shutter then moves across the sensor, blocking any incoming light.
Breaking this down, the sequence is:
- Shutter button pressed
- Mirror up
- First shutter moves to expose light to the sensor. Pause
- Second shutter follows the first, covering the sensor and blocking light.
When you set the ‘shutter speed,’ you control how long the pause lasts.

As shown in the infographic, shutter speed (or the duration of the pause) can be exceptionally quick (1/1000 of a second) or relatively slow (half a second). My camera allows for even finer adjustments to shutter speed.
To freeze quick action, like a runner, without any blur, utilize a rapid shutter speed such as 1/250 or 1/500. To capture fast movement with a sense of blur, use a slower shutter speed like 1/100 or 1/50. It’s advisable to mount your camera on a tripod when using slower shutter speeds.
A side effect of using fast shutter speeds means less light hits the sensor, necessitating an adjustment by enlarging the aperture (smaller f-stop number). Conversely, with a slower shutter speed (where the sensor is exposed to light for a longer duration), use a narrower aperture (larger f-stop number).
Understanding Av and Tv are fundamental to photography. Experiment and discover your unique style; there are no right or wrong choices.
1.) Freeze Using Shutter Speed

This image of The Water Tower in Cardiff was taken using a shutter speed of 1/320 to freeze the continuous flow of water streaming down the tower. Consequently, I reached that number by experimenting with various speeds until satisfied with the outcome.
Because Tv controls the speed of light entering the camera, a fast shutter speed allows less light compared to a slow shutter speed.
To accommodate this, I opened the aperture to f3.5 to ensure adequate light without compromising the freezing effect of the Tv.
2.) Deep Blacks

Pushing the blacks can purposefully remove detail, resulting in a more dramatic image. This particular image was taken under a walkway at Cardiff Bay, where the wooden poles exhibit a lack of detail—the wood grain is obscured, creating solid areas of featureless black. This technique adds significant drama, particularly in travel photography.
Adobe Lightroom (LR) was used to enhance the levels of black and shadows in this image (see below).

In the ‘BLACKS’ and ‘SHADOWS’ settings, slide the controls toward the lowest points and tweak the levels until satisfied with the resulting image.
3.) Frame Up and Wait

Find a great location, frame the shot, and then wait for someone to walk by. Typically, a shutter speed of 1/200 or 1/250 will be sufficient to prevent fast-footed individuals from becoming blurred (unless that blur is desired).
4.) Crop

Do not hesitate to use the crop tool to eliminate unwanted elements within the frame and to create neater, more impactful images.

5.) Flat / Depth

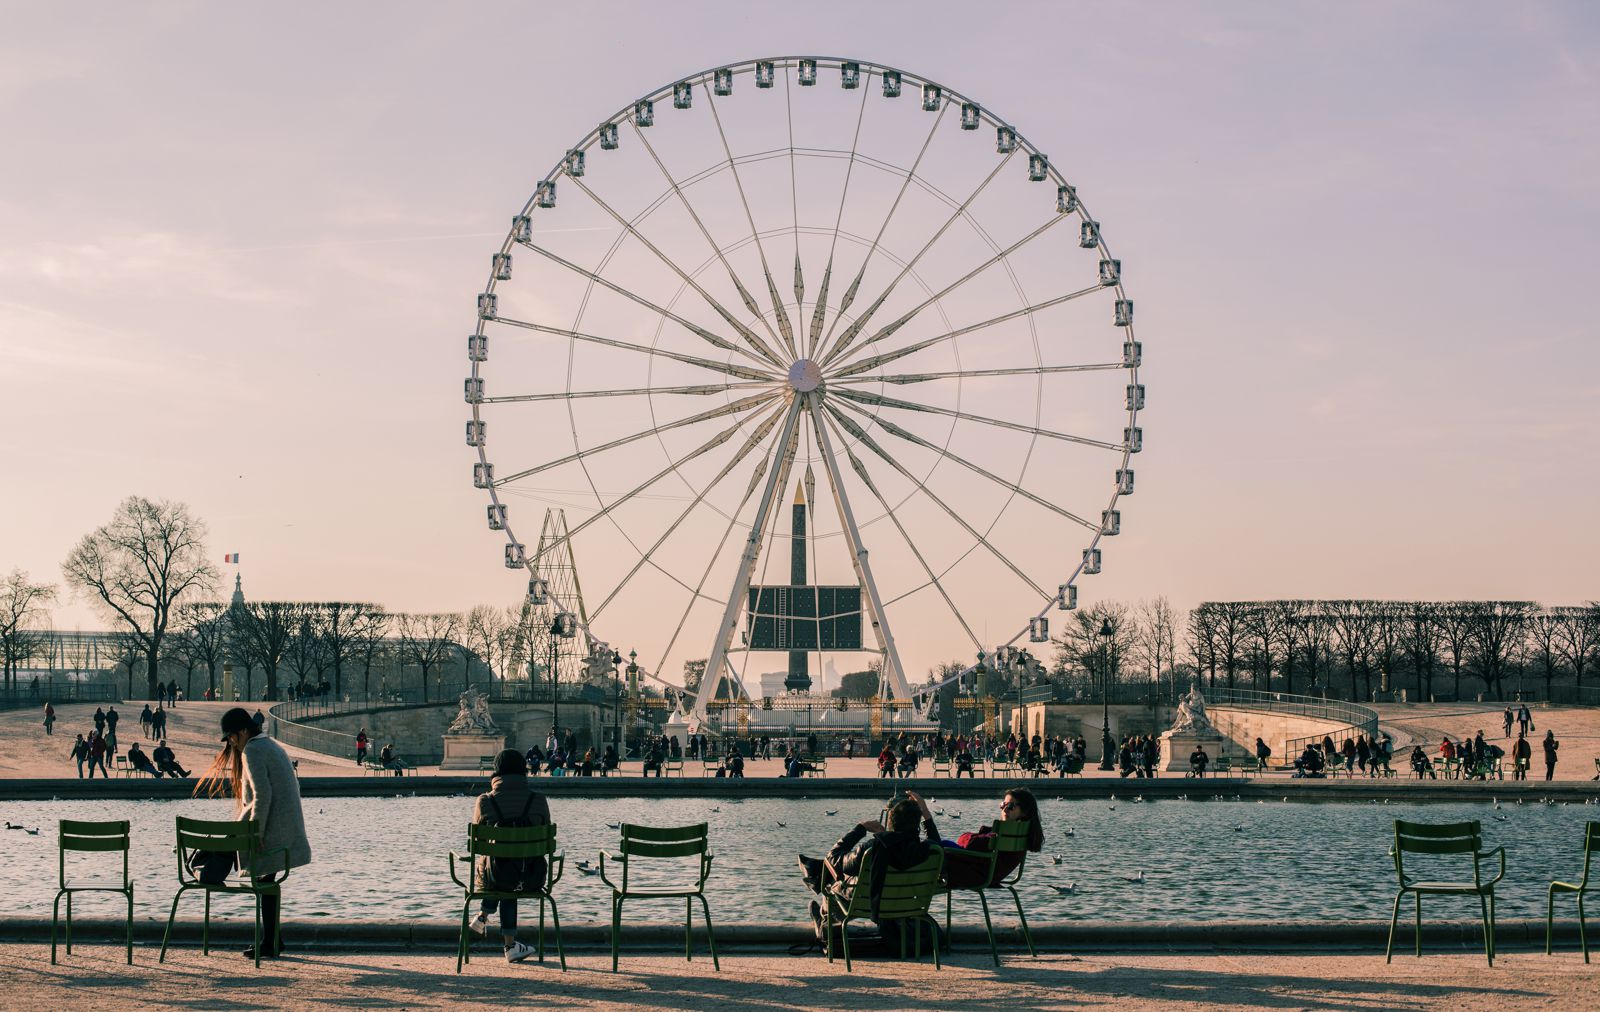
For certain shots, I employ a style termed ‘Flat / Depth’.
In the photo of Roue de Paris, the image appears flat in two-dimensional space. This framing approach results in a layered effect with people, a pond, and the Ferris wheel positioned on different strips within the frame, creating a visually appealing composition.
To achieve this effect, look for patterns in the photos and consider crouching down to alter your perspective.
6.) Understand Story

Every city carries a rich history with numerous stories to uncover. Recognizing these stories and adding your interpretation can lead to compelling images. I captured the following image at Berlin’s Holocaust Memorial, where a woman reminiscent of wartime Europe presented a ghostly appearance. I quickly adjusted my composition, filled the frame with concrete slabs, and pressed the shutter, capturing the eeriness of the moment.
7.) Use the Big Light in the Sky

Most travel photos will be taken using available light (i.e., without flash), so leverage sunlight effectively. You don’t always need to face away from the sun; adjusting towards it slightly can create stunning lens flares, which appear more natural than the artificial effects added in post-processing.
8.) Ignore the Truth

Is a photo truly an unembellished representation of truth? Not exactly—it tends to represent one version of reality. Keeping this in mind, embrace the artistic process. For instance, a base of a statue attracted graffiti, and I elevated the image’s punk aesthetic by employing the Split Toning feature in Adobe Lightroom.

Using the split toning function enables color and tone adjustments for highlights and shadows separately—as seen in this image, a pinkish hue was applied to the highlights and a bluish tone to the shadows.
9.) Achieve Depth by Shooting Through Things

Add depth to your composition by shooting through objects. This technique constructs a narrative or environment within a single image. The symmetrical nature of the captured image was achieved by leveling it from the eye.
Additionally, Split Toning was applied to introduce teal tones to the shadows and a subtle orange to the highlights, while also reducing blacks for a cinematic effect.
10.) Shallow Depth of Field

Using a wide aperture ensures a shallow DOF that highlights specific elements within the frame. In the image above, I used an aperture setting of f3.5 at 1/125. The day was overcast, which reduced the risk of overexposure due to excess light.
However, on a bright summer day, the shutter speed would require an increase to above 1/250 to maintain balance.
With Split Toning, I added teal to the shadows and a soft orange to the highlights, alongside a reduction in blacks.
Top Tip
There are no definitive answers. Experiment, have fun, and discover your own style! You need not rely on excessive equipment. Remember, every iconic image captured in the past was made using gear far less advanced than what you possess today. It is your creativity and originality that matter most—so trust your instincts to create images in your unique way.
Connect through my podcast SHOOT FIRST TALK LATER here: www.sftl.photos. I would genuinely love to see your images and hear your thoughts!
Check Out The Very Best Of Great Britain!


